Environments
Environments are logical groupings within a project where you manage your feature flags, experiments, and user segments. Each environment represents a different stage of your development lifecycle, such as Development, Staging, or Production.
When you create a project, Bucketeer automatically creates two default environments: Development and Production. You can create additional environments as needed for your workflow.
Accessing Environments
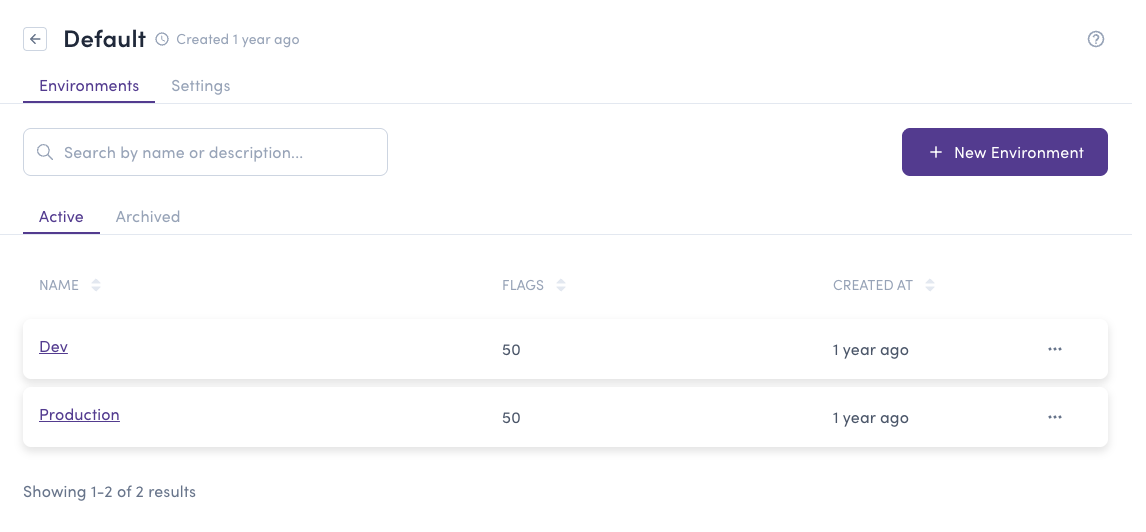
Navigate to your project (outside of Organization Settings) and click the Environments tab.
Creating an Environment
To create a new environment:
- Navigate to your project (outside of Organization Settings)
- Click the Environments tab
- Click + Create Environment
- Fill in the environment information:
- Name - A descriptive name for the environment (e.g., "Staging", "QA", "Testing")
- URL Code - A unique identifier (auto-generated from name, cannot be changed later)
- Description (Optional) - Additional context about the environment
- Require Comment (Optional) - When enabled, users must add a comment when making changes to feature flags
- Click Create Environment
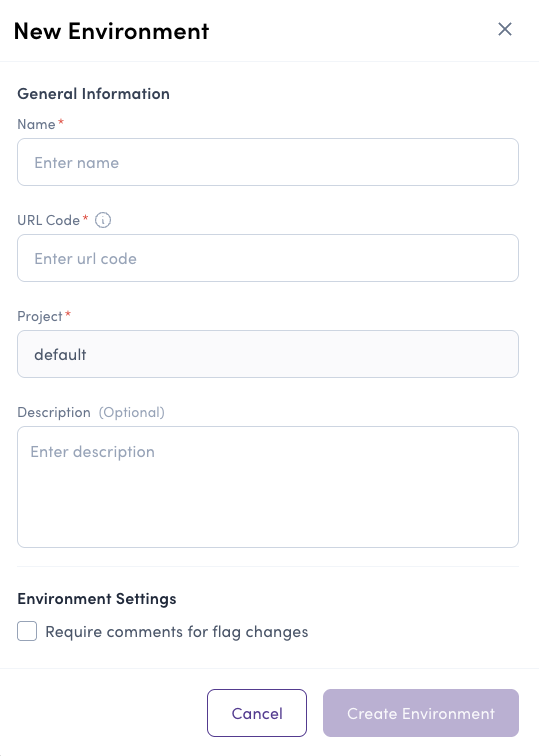
The URL code cannot be changed after environment creation. Verify it carefully before creating the environment.
Environment Settings
Require Comment
The "Require Comment" setting forces users to provide a reason when making changes to feature flags in this environment. This is useful for:
- Production environments where changes need documentation
- Compliance and audit requirements
- Team communication and change tracking
When enabled, users must enter a comment in a text field before saving any feature flag changes.
Managing Environments
Switching Between Environments
Use the menu in the top left sidebar to switch between projects and environments. This menu allows you to:
- Switch between different projects
- Switch between environments within the current project
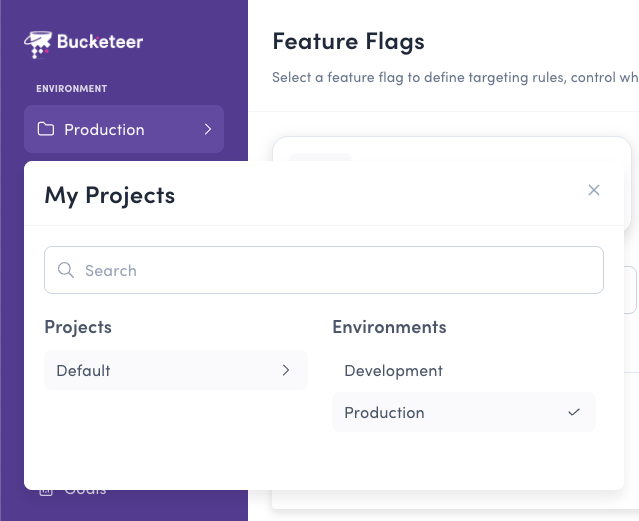
Each environment has its own isolated set of feature flags, experiments, goals, and user segments.
Updating an Environment
To update an existing environment:
- Navigate to the environment settings
- Modify the Name, Description, or Require Comment setting
- Save your changes
The URL Code is a permanent identifier that cannot be modified after environment creation.
Environment Access Control
Access to environments is controlled through member roles:
- Organization Owner/Admin - Automatic access to all environments
- System Admin - Can view every environment in the organization regardless of membership; edit permissions follow the assigned Environment Editor role or organization admin rights
- Member with Environment Editor role - Can manage feature flags and settings in assigned environments
- Member with Environment Viewer role - Read-only access to assigned environments
Environment access is assigned when inviting or editing members. See Members for more details.
Permissions
Only Organization Admin and Organization Owner roles can create or modify environments.
Related Topics
- Projects - Manage projects that contain environments
- Members - Assign environment access to team members
- Feature Flags - Create and manage feature flags in your environments