Integrate to Bucketeer
Integrating Bucketeer with your application is a simple process that's the same across all SDKs. Bucketeer has multiple SDKs available, and you can refer to the SDK page for further information. To integrate Bucketeer into your application, follow these steps:
- Install the Bucketeer SDK: Use your project's dependency manager to install or implement the Bucketeer SDK in your application, allowing it to access the Bucketeer SDK and its features.
- Android
- Flutter
- iOS
- JavaScript (npm)
- JavaScript (yarn)
- Go
- Node JS
dependencies {
  implementation 'io.bucketeer:android-client-sdk:LATEST_VERSION'
}
dependencies:
  bucketeer_flutter_client_sdk: LATEST_VERSION
use_frameworks!

target 'YOUR_TARGET_NAME' do
  pod 'Bucketeer', 'LATEST_VERSION'
end
npm install @bucketeer/sdk
yarn add @bucketeer/sdk
comming soon
comming soon
- Import the Bucketeer Client: In your application's code, import the Bucketeer client, the primary interface to interact with the Bucketeer SDK, and communicate with the Bucketeer service. Each SDK guide covers this step and the previous one in detail. Access the SDKs page to get more information.
- Android
- Flutter
- iOS
- JavaScript
- Go
- Node JS
import io.bucketeer.sdk.android.*
import 'package:bucketeer_flutter_client_sdk/bucketeer_flutter_client_sdk.dart';
import Bucketeer
import {
  BKTClient,
  getBKTClient,
  defineBKTConfig,
  defineBKTUser,
  initializeBKTClient,
} from '@bucketeer/sdk';
comming soon
comming soon
Configure and initialize the Bucketeer Client: Provide the credentials for your environment to configure the Bucketeer client and call the initialization function. The credentials uniquely identify your project and environment and authorize your application to connect with Bucketeer. Below you will find the description of each required information:
- API key: This is a unique key that grants access to Bucketeer. If you have't created one yet, you can create an API key by following the instructions in the Create an API key guide.
- API URL: The Administrator will provide you with the API URL when your user account is created. It serves as the endpoint for your application to connect with Bucketeer's API.
- User ID: This refers to the ID of the end user who will be utilizing the application integrated with Bucketeer. It's important to note that the User ID corresponds to the end user, not the user accessing the admin console or dashboard.
- Feature tag: When creating a feature flag in Bucketeer, you define a tag associated with it. This tag helps identify the specific flag within Bucketeer.
- Android
- Flutter
- iOS
- JavaScript
- Go
- Node JS
// Configure the SDK
val config = BKTConfig.builder()
  .apiKey("YOUR_API_KEY")
  .apiEndpoint("YOUR_API_ENDPOINT")
  .featureTag("YOUR_FEATURE_TAG")
  .build()

val user = BKTUser.builder()
  .id("USER_ID")
  .build()

// Initialize the client
BKTClient.initialize(this.application, config, user)
val client = BKTClient.getInstance()
// Configure the SDK
final config = BKTConfigBuilder()
  .apiKey("YOUR_API_KEY")
  .apiURL("YOUR_API_URL")
  .featureTag("YOUR_FEATURE_TAG")
  .build();

final user = BKTUserBuilder
  .id("USER_ID")
  .build();

// Initialize the client
final client = await BKTClient.initialize(config, user);
// Configure the SDK
let config = BKTConfig(
  apiKey: "YOUR_API_KEY",
  apiURL: "YOUR_API_URL",
  featureTag: "YOUR_FEATURE_TAG"
)

let user = BKTUser(id: "USER_ID")

// Initialize the client
BKTClient.initialize(config: config, user: user)
// Configure the SDK
const config = defineBKTConfig({
  apiKey: 'YOUR_API_KEY',
  apiEndpoint: 'YOUR_API_URL',
  featureTag: 'YOUR_FEATURE_TAG',
  appVersion: 'YOUR_APP_VERSION',
});

const user = defineBKTUser({
  id: 'USER_ID',
});

// Initialize the client
await initializeBKTClient(config, user);
const client = getBKTClient();
comming soon
comming soon
- Assign Feature Flag Variations: The variation method allows you to control whether a flag is enabled or disabled for specific users. By using the
FLAG_ID, you can associate different variations of the flag with different users. If you have't created one yet, use the Create your first feature flag guide. Every time the SDK queries the server, an event is generated. The flag call and the variations are stored on the server in real time.
- Android
- Flutter
- iOS
- JavaScript
- Go
- Node JS
val showNewFeature = client.booleanVariation("YOUR_FEATURE_FLAG_ID", false)
if (showNewFeature) {
    // The Application code to show the new feature
} else {
    // The code to run when the feature is off
}
final showNewFeature = await client.boolVariation("YOUR_FEATURE_FLAG_ID", false);
if (showNewFeature) {
    // The Application code to show the new feature
} else {
    // The code to run if the feature is off
}
let client = BKTClient.get()!
let showNewFeature = client.boolVariation(featureID: "YOUR_FEATURE_FLAG_ID", defaultValue: false)
if (showNewFeature) {
    // The Application code to show the new feature
} else {
    // The code to run when the feature is off
}
const showNewFeature = client.boolVariation('YOUR_FEATURE_FLAG_ID', false);
if (showNewFeature) {
  // The Application code to show the new feature
} else {
  // The code to run when the feature is off
}
comming soon
comming soon
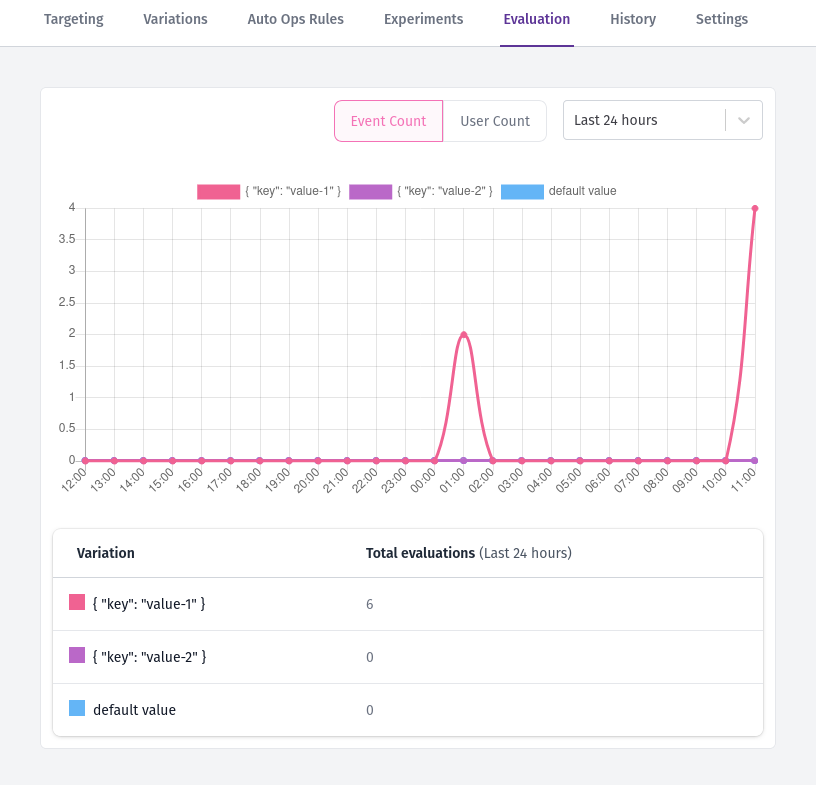
- Check events: Each flag has an Evaluation page where you can track its usage. To check usage data, access the dashboard, go to Feature Flags, select the desired flag, and switch to the Evaluation tab. If recorded data exists on this page, your implementation was successful. Otherwise, revisit the previous steps and make sure you executed tests using the created flag. The image below presents an example of a correct integration.
By following these steps, you can successfully integrate Bucketeer into your application and take advantage of its powerful feature flag management capabilities. If you run into problems related to the Bucketeer system or have some feedback, contact the Bucketeer team. For integration-related issues, contact your Admin or revisit the documentation.